Friday, June 28, 2013

Friday Favorites: Quilts, Kid Projects, and a Batik Fabric Sale!

Between the all day "morning" sickness and busy schedule, this week has been a bit rough. The great part is that I've decided to try and teach Olivia, my two and a half year old to sew. I also just found out about our Batik sale going on which makes me really excited since you guys said how much you loved Batik fabrics.


This video explains how to teach a youngster to sew on a machine. Although Olivia is not at all that calm, I'll try a few five minute sessions to see how it goes. Hopefully we still have all our fingers attached by the end of our short lesson! I might see if she can make a really simple bag to put her small toys in.


On Facebook, I asked about the types of fabrics you guys prefered and you responded with Batiks! So here's your chance to snag some fabric at a low price. There's a bunch of different kinds and their all perfect for that end of summer project you've been planning.


There's a large variety of Batik fabrics to choose from! Check out the Fabric Lovers website!


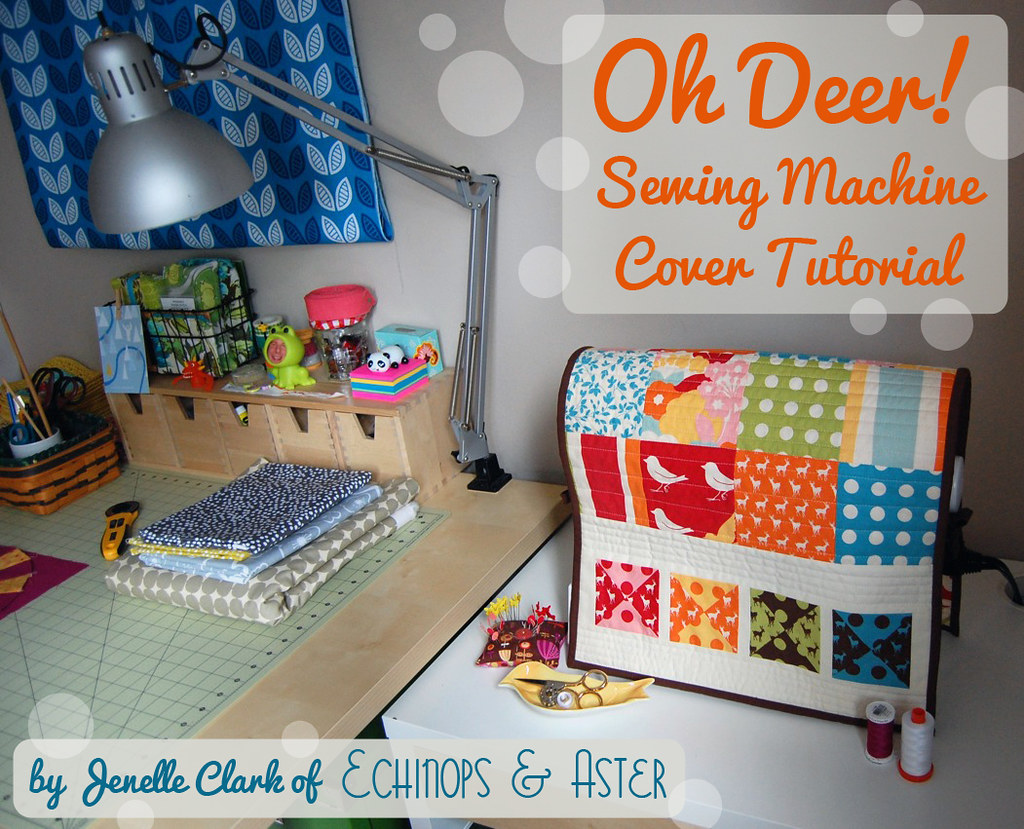
Here's a small quilting project for you! A great sewing machine cover! The tutorial is from the blog Echinops and Aster.


Have any of you laughed when it's inappropriate? Here's an article on how to stop laughing, or at least try to control it, when in awkward situations.

Want something to help you procrastinate? Please follow us on TwitterPinterestFacebook and/or comment below on things you'd like me to feature or talk about!
~Yasmine

Monday, June 24, 2013

Beautiful Batik Fabric..(in just about 3 minutes or so...)

Every wonder why Batiks are always different?  The process is so unique and "free hand".  It is no wonder why any yard of batik fabric never looks the same.

We found a video on the manufacturing process by MODA fabrics http://goo.gl/aEVAK, on how they manufacture Batiks. (We do not carry MODA batiks at this time.)

In about the first 3 - 5 minutes of viewing this YouTube video you will get a feel for how labor intensive and unique the making of this cotton fabric by the yard really is...


We posted a video on the FabricLovers homepage of a recent batik order so you could have a better idea of how dynamic, unique and pretty Batik fabric can be...of course if you have used batiks in your sewing projects or in making a quilt---you already know this.


"get sewing"


Best,

~Beth
www.FabricLovers.com

Friday, June 21, 2013

Friday Favorites: Baby projects, found blogs, and a no-sew project!

It's Friday! I can now sit down and finish my quilt, hopefully. All I have left to do is the binding and although the overall quilt didn't come out as amazing as I had first imagined, I love it anyway. I'll be glad to have that checked off my to-do list soon! And you guys will be able to see it in all it's glory!


I also placed a little announcement this past Father's Day on Facebook. I'm expecting! We had just found out and my husband was so excited he told everyone! So I told our Facebook followers. I won't bombard you with too much about the baby only to post great DIY projects that I plan on doing, or that look just so darn cute and interesting. I hope you guys don't get too tired of it?

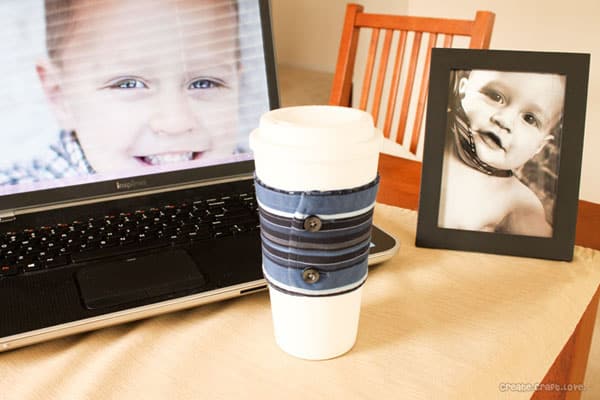
Being so busy that I can't sit down to sew makes me sad, but I did find this lovely project that requires no sewing at all! CreateCraftLove brings us this DIY tutorial for a coffee cozy where you'll never have to pick up a needle and thread! All you need to do is find an old dress shirt of a man in your life, cut off the cuff, and then slip it on your coffee cup. Done!


I also found a really great blog called Domestic Deficit Disorder, which is a name that describes my life, perfectly. The link will send you to a lovely table runner. I just adore those colors and kind of wish I had thought to make that. She's having trouble with the corners though, so maybe you guys can give her some tips?

I also found a way to easily personalize a burp cloth. The tutorial, from the site Make Baby Stuff, would be great if I knew whether I was expecting a girl or a boy! I love it though and will definitely be putting this easy DIY on my list of things-I-hope-to-get-done-before-baby-comes!


I also found this lovely tote pattern on the Fabriclovers.com site. I'd love to create one of these to go to the grocery store. I'd look chic and like I was being thoughtful about the environment! They really do look heavt duty and the wider than usual straps would likely hold up to the amount of stuff I stick in my bags.


Want something to help you procrastinate? Please follow us on TwitterPinterestFacebook and/or comment below on things you'd like me to feature or talk about!
~Yasmine

Monday, June 17, 2013

My First Quilt: What not to do when binding

So I was following the wrong tutorial, maybe? The tutorial called for 2" strips of fabric that would be used to create the edge of the quilt. I cut them and sewed them together.


Finally I sewed them onto the quilt. After finishing, one part I curiously took a break and check other tutorials on the topic. These other tutorials ask for a wider strip and instead of sewing it like I did (one edge first at 1/4" seam). They sewed it at 1/4" seam while folded.


Did I do it wrong?  I'll keep going because although it might take longer, I think I'll get the same result.

I just want to know if there's anyone out there that has done it the way I'm doing it. That tutorial and some others call for a whip stitch (which I have to remember what it is).

Monday, June 10, 2013

Brick and Mortar Highlight: The Glass Thimble

I'm in the final stretch to finish my first quilt and realized I needed binding. I thought I had some stashed away but either I only dreamed it, or my daughter got into my sewing closet again. This event ended up being a great thing though because I was able to visit The Glass Thimble for the first time!


The store, based in Columbus, OH on North High Street, had actually just closed as I walked up to the store but Jamie, one of the owners, was still nice enough to let me in and offer me a tour. I explained what I was looking for and he explained how much fabric I'd need. I even got a small lesson on the difference between regular fabric and Batik fabric!


The store is a lot bigger than it seems and the also offer beads for making jewelry, which my husband will enjoy! Classes are offered for those of different skill levels. They range from handbags to quilt and everything in between. If you're in the Columbus, Ohio area and happen to visit the store, tell me how it went! Say hi to Jamie for me and enjoy the class selection!


Friday, June 7, 2013

Friday Favorites: Quilting, Tutorials, and Next Sewing Project

TGIF! It feels like it took forever to get here, but it's finally here! This week has been a bit crazy but here are some of the little gems I found:

First off, my first quilt is coming along, somewhat nicely. I used to think that quilting was boring and had this preconceived notion that since I knew a bit about sewing, that I could easily make an extravagant quilt. Yes, I was wrong. It's hard, bulky, and I realized I can't sew in a straight line for too long. I also need to purchase some supplies and am using my previous posts (essentials for sewing) as a list.


Now I have a question for you. What should my next project be? Should I make another quilt? A bag? Should I stop now while I'm still ahead?! Please let me know and leave any tutorials you might have in your back pocket! Those could help a girl like me out. Thanks so much!

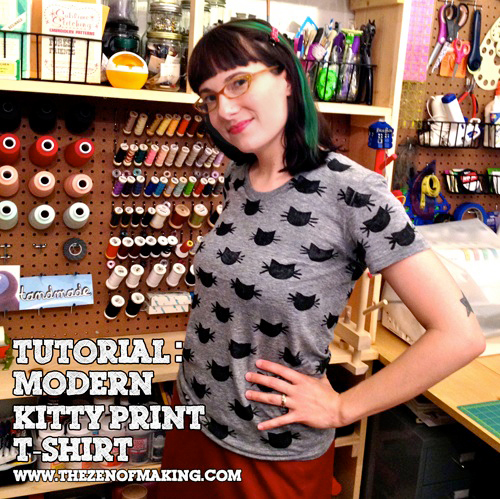
I found this awesome tutorial. Do you like cats? I'm more of a dog person but that doesn't stop me from loving this tutorial from the blog, The Zen of Making, on making your own printed fabric! She made hers into a cat but imagine being able to make one for a dog paw, a fish, or even just fun lightening bolts. It'd be a great gift to give someone.


Now if you didn't want to print cats but wanted cat fabric, I found these for you! The turquoise is by Michael Miller while the Halloween one is by In the Beginning.


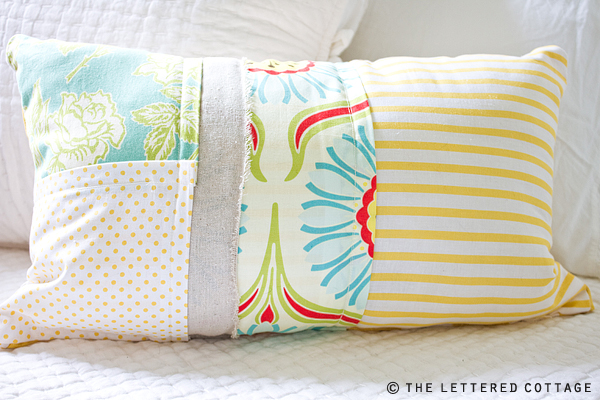
This next tutorial is from the blog The Handmade Home and is simply divine! These easy to make pillows are unique, youthful, and fun! Check out the blog.


We also just got new fabric in! I really want to make something with this one. It's just so clean, simple, and attractive! I love the pop of yellow this could add to a project. It's by Riley Blake and is called Pop Yellow, one of my favorites when it comes to fabric designs.


This next one is a beautiful polka dotted design. We've got lots of new polka dot fabric but I just love how nice the white dots look on the blue! It's also by Riley Blake.


This one is from the Summerhome Collection designed by Kathy McGee. It's just lovely and whimsical with a playfulness that could work in any project like a quilt or even a skirt!


Well, that's it for me. Now it's back to waiting for sweet freedom into the weekend. Please follow us on TwitterPinterestFacebook and/or comment below on things you'd like me to feature or talk about! Thanks!
~Yasmine

Thursday, June 6, 2013

My First Quilt: Ironing, Straight Lines, and Forgetfulness

Quilting is hard. There, I said it. There's so many things the quilter has to remember, which is strange, since I'm not a complete stranger to sewing. Quilts are hard.


Not only are they larger than the typical headband or handbag I make, but they can get bulky if you're in a crammed space trying to sew. Check out my last video to get a small glimpse of the space I was working in.

But I'm still excited, no matter how hard learning to quilt may be. The blanket, although with it's odd mistakes, is almost done! I just need to finish up the edges and I'm set.

When sewing it, I had been trying to follow the instructions on the blog KatieDid. Little did I know that sewing a straight line would prove to be more difficult. As you can see in the photo below, her lines look perfect. Mine, as you can see in the other images, doesn't...


I also decided to use less thread. Is this bad? Should I make more lines on mine to give the quilt more purpose? Please let me know! I'd love to get your feedback on that.


Things I've noted as having done wrong:

1. I failed to use batting that, when ironed, would stick to the fabric. Thereby reducing the shifting of the elements. 

2. I forgot to iron the fabric before sewing the pieces together. I have no idea why I did this!

3. I didn't use enough pins. I should have placed pins closer together to hold the layers together while I sewed. If I had wanted to go the extra mile, I could also have gotten safety pins. This could have helped me avoid all the pricks from the pins.

4. I should have simplified the quilt, like Katie. I should have started off with only a solid or used a solid backing. For some reason, I wanted to do a quilt that was nice on both sides but should have simply chosen a nice fabric for the back.

5. I should have re-read, then read again, all those tutorials. Maybe it's that I'm busy, stressed, or just plain need more vitamins, but it's almost like they went in one ear and out the next! I need to slow down.

Am I disappointed? No. It's a perfect learning experience and not only will the next quilt be better, but I can apply what I learned to all aspect of sewing, not just quilting.

What do you think? Am I crazy? Do you have any tips on whether or not I should do more lines on my quilt or just start on the edges? When I start on the edges, do you have any tips, tricks, or links to tutorials? Let me know!

Please follow us on Twitter, Pinterest, Facebook and/or comment below on things you'd like me to feature or talk about! Thanks!

~Yasmine

Tuesday, June 4, 2013

Quilting Essentials List - Part 2

Here's part 2 of the essential tools for those that sew. One of my essentials (mentioned in the last post), my iron, I seem to have misplaced! Now that I've moved to a new space for sewing, I can't find it and my quilt got wrinkled! If you have any thoughts on what I can do, let me know!

Now back to the quilting essential tools:

6. Pins (regular or safety pins) will help keep everything together and you can never have too many. Since I forgot to purchase the batting that can be held down by ironing it onto the fabric, I've had to resort to using pins. Be careful if you drop one though! You might end up stepping on it or worse, your child could get at it. I suggest having a magnet nearby. You can sweep this over the desk, table, carpet, anywhere. It'll pick up the pins and you'll be ready to go!


7. Machine needles are one of the must haves. Why? From experience, a dull machine needle is horrible to sew with and when you hit a pin, the needle will bend or even break. I was told that even if the needle looks fine after hitting a pin, that I should change it. This will prevent the project from getting ruined.


8. Having been around fabric, I've realized why so many people prefer 100% cotton when it comes to quilting. The fabric will have less of a tendency to bleed and won't wear out so easily. It's kind of an investment but why would you want to create something beautiful only to have it ruined in a short time? Check out sales. That being said though, don't stop yourself from splurging. Especially if that specific fabric design will be the centerpiece of your project.


9. Cotton thread is something you must get if quilting. Why would you spend so much on cotton fabric if you're only going to mix it with polyester? These other threads could be too harsh on your project. There's also a difference between hand quilting thread and quilting thread. You can' use the hand quilting thread on your machine. Instead, invest in a few neutral colors and sew with those until the project calls for something different.


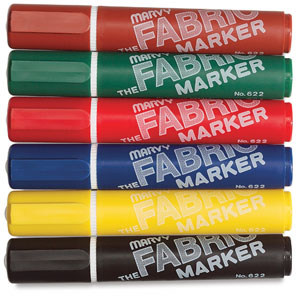
10. Fabric markers are something I need to get! I could use those to create sewing guides, measuring marks and so on. They seem to sell them in three types. Pencil, chalk, or fabric marker pen. A pencil, I found, is the most common and washes out over time while the chalk can come off more easily but isn't good for details. The details can be drawn out with a fabric marker pen. I still say test it out on a small swatch of fabric just in case.

Stay tuned for the update on my quilt and check out part 1 of tool essentials! You can like us on Facebook, follow us on Twitter, check out our Youtube page, and like our boards on Pinterest! I hope to hear from you soon.

~Yasmine